Do you have a “Leftovers Night” at your house? Or a day when you clean out the bits and bobs that have been lingering in your refrigerator? You know what I mean: those three limpy, sad carrots that are too soft for salad, or one lonely baby bok choy whose only hope of being saved from the compost bin is a last-minute soup craving. Oh wait — that’s my fridge. Well, maybe you’ve got something similar going on at your place.
I’ve declared Waste-Less Wednesday at my house as a way of dealing with the leftovers, the oops-I-forgot-about-that, and the meant-to-cook-it-except-I-ate-cereal-for-dinner. Why Wednesdays? Well, like a lot of people, I tend to do my grocery shopping on the weekends, so by mid-week or so, the supplies are starting to run low, and I need to clear out the old before bringing in the new. Rather than just resigning the old, soft, less-pretty produce to the compost bin, I’m often thinking about ways to use up what I’ve got before that next run to the grocery store or the arrival of my CSA box.

As an advocate for reducing food waste, I’ve written a few posts about how I’m walking the talk, so to speak. Broth, roasted and sautéed vegetables, and purées are a few of my quick-and-easy solutions. But I’ve also been thinking about how I can reduce waste even further by finding ways to use all parts of the fruits and vegetables I buy — not just the fruit or vegetable itself. A vegetable version of “nose-to-tail” cooking, if you will. (Not sure what to call it — root-to-leaf, maybe?)
Honestly, vegetable stems are still a tough sell for me, as I learned during my brief dalliance with Swiss chard earlier this year. Fruit and vegetable skins are a different story, though. Unless they’re really bitter, tough, or have a nasty texture, I’ve found that many fruits and vegetables don’t need to be peeled. Carrots are a fine example of a vegetable that I’m now using “skin-on.” Deborah Madison, in her beautiful book Vegetable Literacy says “Much of the flavor and nutrition in carrots resides in the skins, so it’s better to scrub the carrots rather than peel them” (Madison, D. (2013) Vegetable Literacy. Berkeley, CA: 10 Speed Press). If you’re buying locally grown organic or pesticide-free carrots, a thorough washing and good scrub to remove dirt and grit is all you need.
Leaves, on the other hand, have turned out to be oh-so-versatile and are now part of my regular cooking repertoire! (Important to know: most vegetable leaves are safe to eat, but avoid leaves from rhubarb and the nightshade family as they’re poisonous.) Beet leaves, radish leaves, and yes, even Swiss chard leaves pair nicely with most root vegetables and alliums and are delicious when sautéed or braised, then finished with a sprinkling of cheese or toasted nuts.
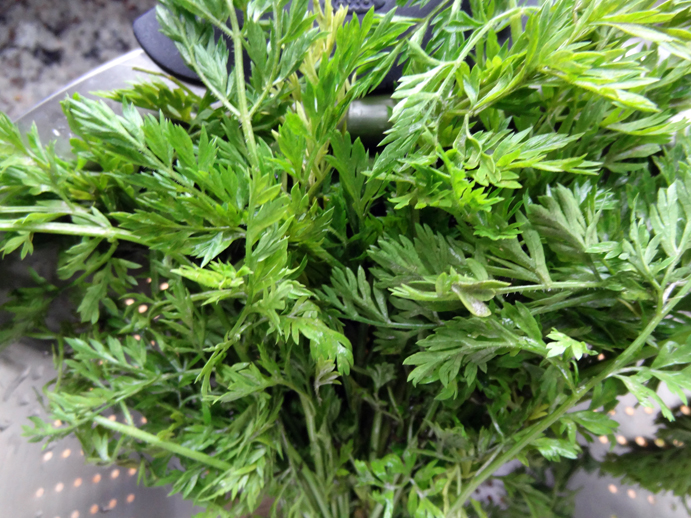
All of this new love for cooking leaves got me thinking… what about carrot greens? What can you do with those? The Nantes carrots that arrive in my CSA box always have the greens attached, and for months I’ve been cutting those greens and storing them in the bottom of my refrigerator while waiting for inspiration to strike. Didn’t happen. Unfortunately, I ended sending those bunches of carrot greens, along with a serving of guilt, to the compost bin.

Then finally, a few weeks ago, I happened to pick up a copy of Diane Morgan’s Roots cookbook, which is an inspiring source of education and recipes for just about any root vegetable you can think of. (If you love root vegetables, you will want to add Roots to your cookbook collection.) And whaddaya know? In Roots I found a carrot top pesto recipe that I wanted to try — no, wanted to eat. It’s become my new go-to snack/pasta topping/fish condiment. It’s a perfect quick holiday party dip, complement to roasted vegetables, or finishing touch to a comforting vegetable soup.
Oh, and in case you’re wondering whether you can eat carrot greens (there’s some misinformation floating around the interwebs that carrot greens are poisonous), you should know that not only are they are perfectly fine to eat, but they’re good for you. Deborah Madison says in Vegetable Literacy that carrot greens are “[r]ich in Vitamin K, chlorophyll, and potassium,” but “they can be somewhat bitter…. Just use the most tender of the fern-like branches.” Of course, if you’re allergic to carrots or carrot tops, then make sure you take the appropriate precautions, or better yet, play it safe and just enjoy the food porn below.
Recipe: Carrot Top Pesto
Adapted slightly from Roots by Diane Morgan (Chronicle Books)
Yield: about 6 ounces pesto
I’ve modified this recipe based on my home equipment (an 11-cup food processor), and the ingredients I had on hand. I’ve also added tips that I hope you’ll find helpful. Just so you know, carrot greens have a grassy, somewhat bitter flavor, that can dominate the pesto when it’s freshly made. If you can, chill the pesto in the refrigerator for at least a couple of hours before serving so that the flavors marry and the mixture mellows a bit.
What you need:
Kitchen scale
Food processor
Rubber spatula
Ingredients:
1½ cups well-washed, loosely packed feathery carrot leaves, removed from the stems (1½ cups is about the amount of leaves from the greens attached to a pound of carrots. To remove the leaves, grab the center of a stem with one hand and use your other hand to pull the leaves downward and off the stem.)
3 ounces of extra virgin olive oil
1 large garlic clove, smashed and broken into 3 or 4 pieces
Scant ½ teaspoon kosher salt
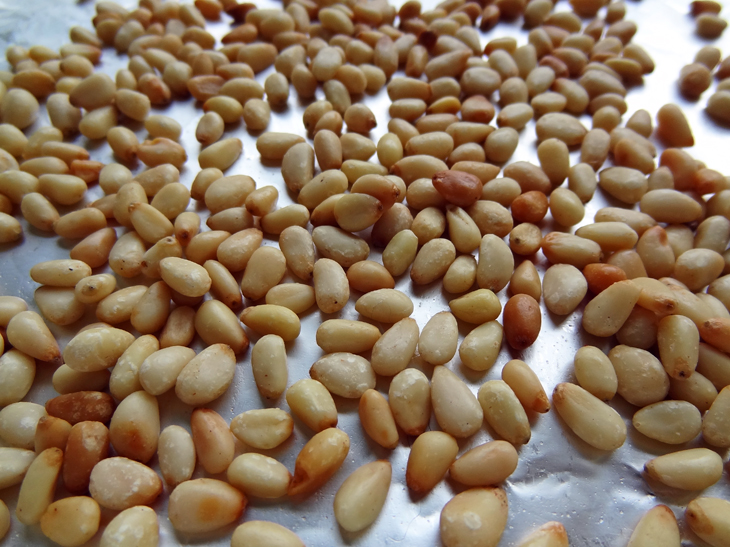
4½ tablespoons toasted pine nuts
45 grams (1.6 ounces) shredded or grated parmesan (I used a combo of finely shredded parmesan, asiago, and fontina. I like the rustic texture of shredded cheese, but if you want super-smooth pesto, go with finely grated cheese.)
How to:
- Technique for toasting pine nuts: Preheat toaster oven (or large oven) to 325°F. Place nuts in a single layer on a parchment-lined baking pan. Heat for about 5 minutes or until nuts are a golden-brown color. Allow to cool to room temperature.
- Combine the carrot leaves, olive oil, garlic clove, and salt in the food processor bowl. Pulse until the carrot tops and garlic are finely chopped.
You’ll be pulsing the mixture a few more times when you add the pine nuts and cheese, so don’t worry if everything isn’t finely chopped and smooth. I’ve found that processing the carrot leaves too finely early on brings out the bitterness. (Of course, if you like that sort of thing, then rock on.)
Carrot leaves, olive oil, garlic clove, and salt in the food processor and ready to go! - Add the pine nuts and pulse until finely chopped and combined with the other ingredients.
- Add the cheese and pulse just until everything is combined.
If you prefer a smoother pesto, process the mixture a bit more until you see the consistency you prefer. If you like a chunkier, more rustic pesto, then your work here is done.
I used shredded cheese, but you can use the classic: grated parmesan - Taste the pesto and adjust the salt as necessary.
- Serve immediately or refrigerate for at least two hours to allow the flavors to marry and mellow.
Depending on your palate, the pesto might taste very “green,” with the carrot leaves dominating (also, if you processed the mixture more finely at the beginning, you’ll also taste a more green or grassy flavor). Letting the pesto rest and chill brings the pine nut and cheese flavors forward so that the flavors are more balanced.


3 thoughts on “Waste-Less Wednesday: Carrot Top Pesto”