When was the last time you took a good look inside your freezer? Do you know what’s living in there, under the frozen peas and ice cream? For many of us, the freezer is like a hall closet for food. We just keep shoving stuff in there until one day it all comes tumbling out, and we finally have to decide to pitch or keep that frozen mass of … what was that again? And how long has it been in there?
One way to keep a handle on what’s going into your freezer — and how long it lives there — is to label freezer items with the “date in.” All you need is a Sharpie and some freezer tape. For each item that goes into the freezer, take a minute and write the current date on a piece of freezer tape. (Add the name of the item, too, if it’s packaged in an opaque or unlabeled container, freezer bag, or layers of foil. ) Affix the tape to the item, and voilà. No more guessing games about how long that foil-wrapped thing has been wedged behind last week’s ice cream and under last year’s frozen pizza.
I’ve been a labeler since culinary school. All good, right? Yes and no. The followup to labelling is, that you have to — every few months — take a look at what’s actually living in the freezer. If you focus on a mostly fresh-food diet, then you might not be digging into the freezer that often. I use my freezer as a place to preserve foods — breads, summer fruit that I want to enjoy later in the year, stocks and broths, and vegetable scraps for said stocks and broths. In short, it’s place to store food until I get around to doing something with it. Problem is, often out of sight, out of mind. Hence the need to check in every few months.
Given that we’re into the first week of May already, summer garden vegetables and u-pick fruit are on their way. Unfortunately, I still have last year’s overages of backyard apricots and Swanton Berry Farm strawberries taking up most of my freezer. Sheesh. (Ok, so I’m not so good at the every-few-months check-in.) So while most Waste-Less Wednesdays have focused on ways to reduce waste by rescuing or repurposing what’s in front of you — in the refrigerator or on the countertop — let’s not forget about what’s going on in the freezer.
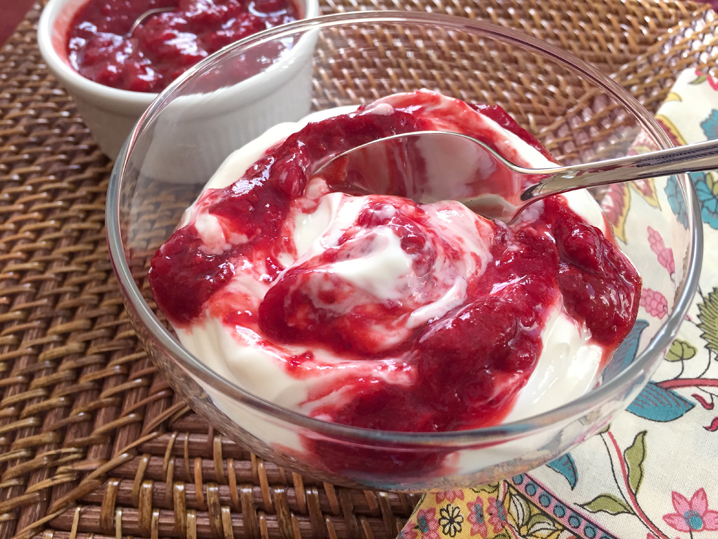
So, let’s say you’ve got an excess of freezer fruit. What to do? While freezing fruit often maintains most of the flavor, the texture is another story. Soft fruits like berries and apricots don’t bounce back so well when thawed, which means they’re ideal for smoothies or cooked fruit dishes. A simple way to enjoy previously frozen fruit? Make a compote. While it might sound fancy, the making part is easy. A compote is fruit cooked in liquid with sugar added for sweetness. Perfectly delicious on their own, compotes can also dress up Greek yogurt, elevate waffles and pancakes, or add a touch of decadence to your favorite ice cream.

So, start digging through your freezer. If you’ve got last year’s frozen berries — or store-bought frozen berries will do in a pinch — you can have a tasty, homemade fruit compote in about 15 minutes.
Recipe: Strawberry-Orange Compote
Yield: About 8 ounces
This recipe omits the water to produce a chunkier compote, and (bonus!) is a great way to use up one of those packets of orange zest you might have lingering in your refrigerator. Delicious warm or cold, you can enjoy this compote on its own (or with a dollop of vanilla whipped cream) or as a complement to a variety of other treats. Serve it warm or at room temperature with cakes, waffles, rice pudding, or pancakes. Serve cool over ice cream or yogurt.
Ingredients
12 ounces frozen strawberries (previously washed, dried, and hulled)
1½ – 2 ounces organic sugar (to your taste)
1 heaping teaspoon fresh orange zest

What You Need:
Rubber spatula
2-quart saucepan
Small plate
Small glass or ceramic bowl or dish (to hold up to 10 ounces)
How to:
- Combine the sugar and berries in the saucepan and place it on the stovetop over medium-high heat. Stir occasionally so that the berries cook evenly and don’t stick to the pan.
After about five minutes, the berries will begin to soften and release their juices, combining with the sugar to make a syrup. - Use the tip of the spatula to break the berries into smaller, bite-size pieces.
Don’t worry about creating even-size pieces. - Continue cooking until the syrup thickens and berries are soft and in pieces, about 10 minutes.
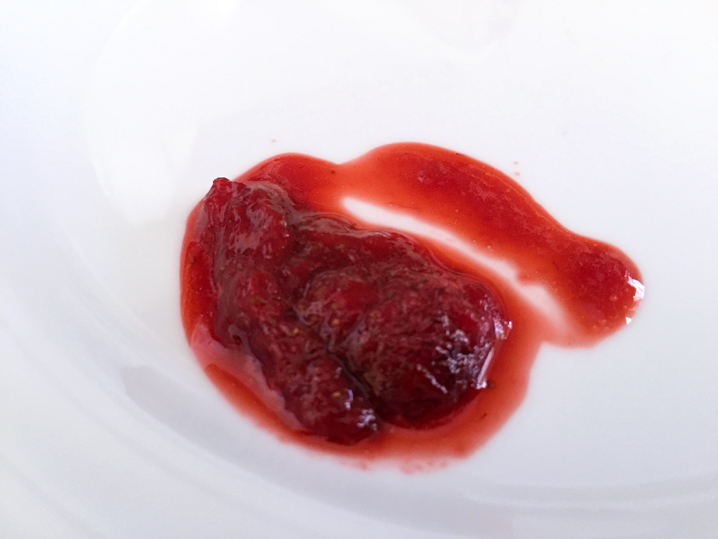
- Check the consistency of the compote by taking a small spoonful of the syrup from the saucepan and putting it on the plate. Place the plate in the freezer for about 20 seconds, just enough to bring the temperature down.
- Retrieve the plate from the freezer and run your finger or the tip of the spatula through the syrup. If the gap closes quickly, continue cooking the compote for a minute or two, testing it again for doneness. If the gap closes slowly, the compote is ready.
- Taste the small sample from the plate and adjust the amount of sugar, if neccessary.
If you’d prefer a sweeter compote, stir another teaspoon of sugar into the hot compote until fully combined. Taste a cooled sample of the compote to determine whether you need to add any more sugar. - Remove the saucepan from the heat and stir in the orange zest.
- Transfer the compote to the glass or ceramic dish (Pyrex is a good choice), cover with plastic or parchment paper, and place in the refrigerator to cool.
- Serve cold or rewarm gently in the microwave before serving.

- Store in a covered container in the refrigerator for up to 1 week.


One thought on “Waste-Less Wednesday: Strawberry-Orange Compote”