Waste-Less Wednesday: Getting the Most from Summer Fruit
June 17, 2015 § Leave a comment
Ever feel like you’re in a race to keep ahead of food waste at home — particularly during the summer? Summer, for all of its wonderful bounty of fresh produce from CSA boxes, farmers’ markets, and home gardens, also presents a challenge: how to make the most of the fruits and vegetables that come into your home before they get too soft, wilty, or (ugh) moldy? With the drought continuing here in California, it seems more important than ever to use up what comes into the kitchen, rather than letting it any of it go to waste.
I seem to be managing the vegetables so far (salads — lots of salads with an array of lettuces — paired with roasted vegetables like fennel and carrots), but the fruit is another story. Between glossy, large, bright-red strawberries from Fifth Crow Farms and an abundance of quickly ripening backyard apricots and long-lingering lemons, I’ve got more than my fair share of fruit — and with it a small case of FOMO. I mean…What if I don’t make the most of that fresh, seasonal fruit while I can?
If you’re struggling with the idea of not enjoying all of that fruit while it’s fresh, ease up. The beauty of eating seasonally is that you get to look forward to that bounty and really appreciate it while the food is available — when it’s at the peak of flavor and freshness. But you also have the option to preserve that fruit for later enjoyment, too. So, here’s your cheat sheet for enjoying summer fruit now and later. From proper storage to freezing to (yes, you can!) making jams and preserves, here are some ways to reduce summer fruit waste at home.
Optimal Storage
I try to get as much life out of my fruit as possible, which starts with storing it appropriately. First thing to know: different summer fruits have different storage needs. More important is that not every piece of fruit has to (or should be) stored in the refrigerator. After many years of trial and error, here’s how I’m storing summer fruit.
- Berries: Don’t wash until you’re ready to use them. To store, line a plastic or glass storage container with paper towel. Arrange the berries in a single layer on the paper towel, cover with a well-fitting lid, and store on the top shelf of the refrigerator. Soft berries (raspberries, blackberries, etc.) will last a few days at most. I’ve been able to keep strawberries and blueberries this way for up to 10 days, but typically have to replace the paper towel and wipe down the interior of the storage container to remove condensation every 3-4 days.
- Stone Fruit: Again, I don’t wash stone fruit until I’m ready to use it. Store ripe fruit in a single layer in a dish or on a sheet pan at room temperature and use or freeze it within 2-3 days. Storing stone fruit in the refrigerator results in an unpleasant, mealy texture, so don’t do it. (Note: Cherries are the exception! Store cherries in a closed container or ziplock bag in the refrigerator to extend their lifespan.)
- Citrus: Wash, dry, and store at room temperature in a dish or bowl if you’re going to use them within 2 days. Otherwise, store in a ziplock bag (with the air pressed out) in coldest part of the refrigerator (usually the bottom shelf or crisper drawer). I’ve kept citrus this way for up to three months.
Freezing
Already know that you’ve got too much fruit on hand and want to freeze some for later? There are three ways to prepare fruit for freezing:
- Unsweetened Pack
- Syrup Pack
- Sugar Pack
I’ve tried all three methods and have found that the unsweetened approach is quickest, easiest, and leaves me the most flexibility for using the fruit when I thaw it. Here’s how:
- Wash the fruit, removing any dirt. Place on paper towels or cotton kitchen towels and pat dry, removing as much moisture as possible.
- Cut away any bruised, damaged, or moldy spots, then prepare the fruit as follows:
Strawberries: Remove green tops and hull.
Stone fruit: Slice in half and remove the pit.
Blueberries and soft berries: Remove any stems. - Arrange the fruit in a single layer on a parchment paper-lined sheet pan (don’t crowd or pieces might stick together when frozen), then place in the freezer for an hour or so — just until the fruit is frozen.
- Store fruit in a freezer bag with the air pressed out.
For more information about freezing fruit using the syrup and sugar pack methods, check out The National Center for Home Food Preservation’s web site.
Making Fruit Compotes
Compotes are my favorite way to use up berries that are past their prime for eating out of hand or not pretty enough for decorating a cake or tart. Berries, sugar, and lemon juice are all you need to make a quick berry compote, and you can tailor the amount of sugar and lemon juice to your taste.
Need a starting point? For every 6 ounces of berries, add 1 to 1½ ounces of sugar and a teaspoon of lemon juice. Cook in a saucepan over medium to medium-high heat for 10 minutes for a thinner, saucy compote, or as long as 15 minutes for a thicker, jammy compote. Try this Strawberry-Orange Compote (or substitute your favorite berries).
Preserving: Jams and Marmalades
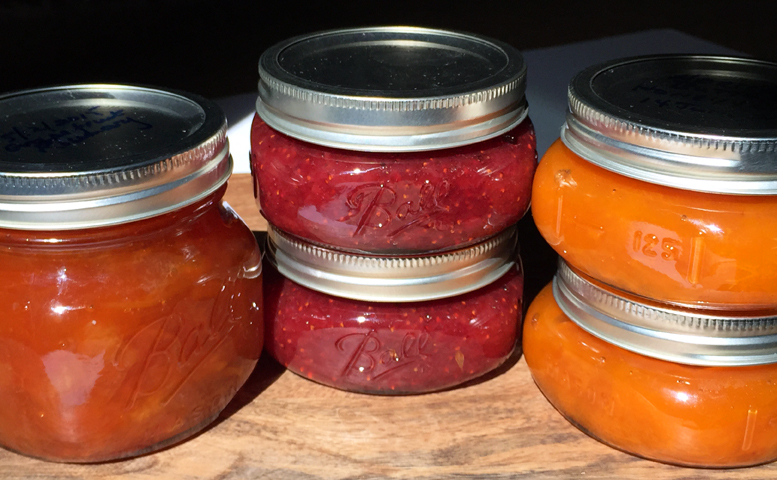
I’ve been baby stepping my way into canning this year, but it’s turning out to be my new addiction! When I made my first batch of marmalade, and the canning seals didn’t bounce back when I tested them, I did the happy dance around my kitchen. After another successful batch of marmalade, I was ready to move on to making apricot butter, and then strawberry jam.
If you’ve been thinking about canning, but felt uncertain or afraid, don’t let that hold you back! It’s easier and less scary than you might think! Just take the time to learn a little about the process of canning and why it’s important to follow recipes and canning steps as written. Here are some resources that I’ve found informative and helpful.
- Easy citrus marmalade: If you’re just starting out, this Blood-Orange Rosemary Marmalade from The Herbfarm Cookbook is an easy introduction to canning. Prep work is minimal, and there’s no water bath processing step to worry about (you will have to sterilize the jars and lids, though). I’ve substituted regular oranges and ruby grapefruits with success.
- Small-batch canning: If you’re short on kitchen storage space or don’t want to invest in making large batches of jam (seriously, what would I do with 10 pints of jam??), then small-batch canning is for you! What do I mean by small-batch canning? Think: 2—4 pints or half-pints at a time. Food in Jars blogger and author Marisa McClellan offers a wealth of information about the equipment for and process of canning on her website, not to mention some tasty recipes. (Use the site’s search box to locate small-batch jam recipes or scroll through the recipe index.)
- Pectin-free, low-sugar fruit jams: While searching for small-batch, pectin-free, low-sugar recipes, I stumbled upon this post on Northwest Edible Life. Blogger Erica not only provides a detailed introduction to making jam the old-school way, but also offers up this fun chart for creating your own custom flavors.
Sharing Is Caring
And let’s not forget the simplest way to reduce food waste: share with family, neighbors, and friends. Every summer I trade apricots to my next-door neighbors for their home-grown tomatoes. They make apricot pie, and I make a batch of oven-dried tomatoes (some of which eventually make it into the freezer for longer preservation!).
Want a broader community for sharing your abundance of home-grown fruits and vegetables? Try offering it on neighborhood websites Freecycle.org or Nextdoor.com.
How are you preventing summer food waste at home? Share your ideas and thoughts in the comments below or on our Facebook page.
Waste-Less Wednesday: Smashed Cauliflower on Toast with Rocket and Radish
May 19, 2015 § Leave a comment
What’s up with our weather? The recent stretch of cloudy, cool days feels like more spring in Seattle, than spring in the Bay Area. We should be well into our second heat wave by now! (I joke.) Maybe it’s this pre-summer limbo or the grey days, but I’ve been craving comfort food. Nothing as solid as the roasted vegetables or heavy soups of fall and winter, but something warm-ish, fresh, and easy to make. Something on toast, perhaps.
I know, I know, toast is all the rage now. $4 toast. Avocado on toast. Soft egg on toast. (Really, I don’t think I can see one more “genius” toast recipe.) For me, lunch or dinner on toast is old school. I grew up in a household of “things on toast” — pretty typical for my transplanted Australian family. I’m not talking about a toasted sandwich or toast-n-jam. Nope, I mean a small, filling meal with toast as the foundation, topped with something savory and substantial.
Spaghetti on toast is an Australian classic and a typical mom-doesn’t-want-to-cook meal in my house when I was a kid. Often it was a Sunday dinner kind of thing. Saturday dinners were classic roasted beast with veg, but Sunday dinners were simple and casual. Occasionally spaghetti on toast was a mid-week meal: a quick way to use up the previous night’s leftovers of that iconic Australian dish, Spaghetti Bolognese. (Yes, believe it or not, Spaghetti Bolognese is an iconic Australian dish, thanks to a post-WWII influx of Italian immigrants.) If you didn’t have any “spag Bol” on hand, spaghetti-o’s were a quick-and-easy stand-in — and actually preferred by the kids for the sweet sauce and the fun o’s.
Sick-in-bed days meant scrambled or poached eggs on toast. As soon as I could reach the toaster, Vegemite and cheese on toast was a go-to, good for a solid breakfast or fast lunch. And then of course, there’s my father’s favorite: asparagus on toast. Did you just get an image of bright green, fresh (maybe grilled) stalks, drizzled with olive oil and a dash of sea salt. Yeah, no. Dad’s favorite on-toast meal calls for canned asparagus. Why? Because you can smoosh and spread it on toast with a fork. Of course. He still gets a little boyish when he makes it. “I’m having asparagus on toast,” he’ll announce to anyone within earshot of the kitchen. You go Dad.
Recently I found myself with a few leftover cauliflower florets and not nearly enough arugula (aka, rocket lettuce) to make a salad or even a small pasta dish. But hey, if I steamed the cauliflower past the al dente stage, couldn’t I smoosh it like mashed potatoes (or Dad’s canned asparagus), mix in some olive oil, mound it onto some toast and top it with the peppery arugula leaves? Yes, I could. Plus, I’ve been crushing hard on this nutty, dense spelt bread lately, so it would be the perfect delivery device for the smashed cauliflower.
How about that: from leftover bits of produce to a fast, healthy, vegetable-based meal that’s ready in 15-20 minutes. Warm, flavorful, and with enough textures and flavors to keep your mouth interested. Genius? Nah, just good ol’ Aussie-inspired comfort food.
What’s your favorite toast-based dish? Share in the comments below or on our Facebook page.
Recipe: Smashed Caulilflower on Toast with Rocket and Radish
Yield: 1 serving (or 2 small servings, if you’re willing to share)
This quick meal is a comforting, yet flavorful way to enjoy fresh-from-the-market produce or to use up any bits of older vegetables that are lingering in your refrigerator. Mixing the smashed cauliflower with salt and olive oil gives it a creamy texture and buttery flavor. The nutty taste and denseness of the toast adds substance, while the earthiness of the arugula and peppery flavor of the crunchy radishes balances the softness of the cauliflower. You can make this recipe vegan or non-dairy by 86-ing the cheese.
What you need:
Saucepan with lid and steamer insert (2-3 quart capacity)
Small bowl
Fork and/or spoon
Toaster or toaster oven
Ingredients:
6 ounces cauliflower (about 1½ heaping cups), cut into 1-1½-inch pieces
1 teaspoon extra virgin olive oil, plus extra for drizzling on the toast
1 teaspoon chopped or snipped chives (no larger than ¼-inch pieces)
2 pieces of sturdy, nutty bread, such as spelt or sprouted grain
¼ cup chopped arugula (rocket lettuce)
1 small radish, sliced into matchstick-sized pieces
Salt and pepper to taste
Optional: Thin slices of sharp cheddar cheese (I used paper-thin slices of aged raw milk cheddar; you’ll need a sharp knife to cut thin slices)

A showcase of local, organic produce paired with olive oil, freshly ground black pepper and sea salt, complemented by a nutty, dense spelt bread
How to:
- Fill the saucepan with 1-2 inches of water (depending on where your steamer insert sits in the pan), place the steamer insert in the saucepan, cover with a lid, and bring the water to a boil.
- As soon as the water reaches a boil, turn the heat to medium-high to keep the water simmering, but not at a high boil. Place the cauliflower in the steamer insert and cover with the saucepan lid. Steam the cauliflower for 10 minutes.
When the pieces are fully cooked, you should be able to easily smash them with a fork or spoon. - Transfer the cauliflower pieces to a small bowl and smash them with a fork or the back of a spoon. Meanwhile, make the toast.
When you start smashing the cauliflower, you’ll get something that looks like rice.
Keep smashing the cauliflower until the mixture resembles lumpy mashed potatoes. - Add the olive oil, chives, and salt and pepper to taste. Mix to combine thoroughly.
- Drizzle each piece of toast with just enough olive oil to coat the top, but not soak through the bread.
- Optional: Add some umami by covering each piece of toast with a thin slice of cheese.
Think of the cheese as a condiment here. The cauliflower is the star, so keep the cheese slices thin. Keeping things vegan or dairy-free? Skip this step. - Divide the cauliflower mixture, mounding half on each piece of toast, then spreading it out to the edges of the bread. Top with radish matchsticks and chopped arugula.
- Finish with a small drizzle of olive oil and a twist of freshly ground black pepper.
Waste-Less Wednesday: Meyer Lemon Curd
May 13, 2015 § 2 Comments
So, let’s say you zest 10 or 12 Meyer lemons for Organic Meyer Lemon Limoncello, leaving you with a bunch of nekkid fruit. And then? Juice them, of course. And then? Then you have about a pint of Meyer lemon juice. And then? Exactly. Now you have to come up with a way to use up that lovely, fresh lemon juice. Sure, you can dip into that pint when making salad dressings, lemonade, lemon sorbet, and so on, but what about a recipe that really lets the fresh, unique flavor of Meyer lemons shine — and makes a serious dent in the amount of lemon juice taking up space in your refrigerator?
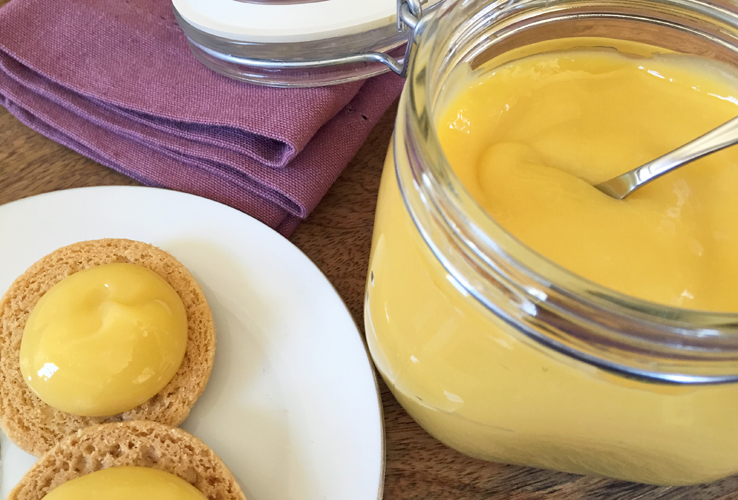
The answer to “And then?” is Meyer lemon curd! Having luscious, creamy, tangy-sweet lemon curd on hand means that you’re halfway to quick lemon tarts, lemon bars, or a sunny topping for pound cake or scones. Sweet! (Dude!)
Lemon curd is not a jam or a sauce, it’s actually a custard (although you can thin it with juice or cream to make it saucy). Other sweet treats that are custards? Crême brulée and ice cream, for example. A custard, by definition, is a combination of eggs, milk or cream, and sugar, typically cooked either on the stovetop or in the oven. Lemon curd substitutes lemon juice for the milk or cream and gets its creamy mouthfeel from the addition of butter at the end of the cooking process.
While Meyer lemon curd seemed like a good waste-less solution to too much lemon juice and some eggs that were teetering on being too old to keep around, finding the right recipe was a bit of a problem. My go-to lemon curd recipe calls for a small pile of zest and egg yolks (not whole eggs, just yolks). Not an ideal solution because I’d end up with leftover egg whites and more nekkid lemons, which meant more juice. Hmmm, this didn’t seem to sit right with the Waste-Less Wednesday mission to reduce waste. I was trying to reduce waste, not create more.
What I needed was a lemon curd recipe that met these criteria:
- No zest required
- Whole eggs or whole eggs plus one or two yolks (Why one or two? Because you can easily use up one or two egg whites making an egg-white omelette or Pisco Sours!)
- Not too sweet
- No straining necessary
So what about that last part — no straining? No, I’m not referring to the amount of physical effort required to make the curd! Depending on how you cook the lemon curd, you can end up with some cooked egg bits in the finished curd that you’ll need to strain out if you want a completely smooth lemon curd. Temperature is the culprit here. Egg whites cook more quickly than egg yolks, so it’s key that you whisk the egg whites and yolks together thoroughly before you start cooking the curd.
Cooking technique is also a factor. Recipes that call for cooking lemon curd directly over heat (as opposed to in a double-boiler setup) — or even boiling the curd — can result in uneven or too much heat too quickly, causing the eggs in the mixture to curdle. What you need to know about cooking custards is that you want to cook them low and slow — with evenly distributed heat. That’s why custards are often cooked in or over water baths. So, really all lemon curd needs is a double-boiler setup and your undivided attention for 10-15 minutes.
Ah, where to find this unicorn of lemon curd recipes? It was a quest — through a dozen cookbooks and magazines and half a dozen online recipe sites.
Who knew there were so many different (and yet similar) lemon curd recipes in the world? After all of that research, I can’t say that I found one recipe that met my criteria for ingredients and technique together, but I had some reliable sources to draw on for inspiration in creating my own easy-to-make, rich lemon curd.
What did I learn?
- You can make a flavorful lemon curd without zest (adding zest to the mix will amp up the flavor, no doubt, but it’s not required)
- Egg yolks give the curd its vibrant yellow color and rich flavor, so use eggs with rich yolks
- Balance between sweet and tart is essential, so the amount of sugar should be less than or equal to the amount of juice in the recipe
- You can cut out the straining step by keeping the cooking temperature even and stirring the mixture continuously
Have you made lemon curd? With or without zest? Strained or not? Share your thoughts and experiences in the column below.
Recipe: Meyer Lemon Curd
Inspired by: The Culinary Institute of America and Ripe for Dessert by David Lebovitz
Yield: About 16 ounces
Here it is: a zest-free, no-strain, minimal-waste, creamy lemon curd with all the sweet tangy flavor of Meyer lemons. (Note that I do include an optional straining step, in case you need it.) Make sure that you can commit an uninterrupted 10-15 minutes to the cooking process. You need to stir the curd continuously during this time. Serve this luscious treat as a complement to plain baked goods, such as cakes or scones, as a topper for waffles, or with fresh berries.
What you need:
Double-boiler or 2-quart saucepan and Pyrex or stainless steel bowl that fits securely in the top of the saucepan
Whisk
Wooden spoon
Kitchen towel or hot pad
Medium-sized Pyrex or stainless steel bowl
9″ x 13″ metal baking pan for ice-water bath
2 dozen ice cubes
Optional: Instant read-thermometer
Optional: Fine-mesh strainer
Ingredients:
6 ounces freshly squeezed Meyer lemon juice
6 ounces fair trade organic sugar
2 large eggs
2 egg yolks, from large eggs (total weight of eggs plus yolks is about 5 ounces)
3 ounces sweet butter, cut into small pieces
Pinch of salt
How to:
- Fill the saucepan with approximately 2 inches of water, cover with a lid, and bring to a simmer. Turn the heat to medium-high.
You want to be sure that there’s enough water to keep the simmer going, but not so much that the insert or bowl will be immersed in water when you place it on top of the saucepan. Also, you shouldn’t see any steam coming from the saucepan. If, at any time during the cooking process, steam starts to come out of the saucepan, turn down the heat.
- Prepare the ice-water bath. Fill the baking pan with a dozen ice cubes and then add enough water to fill the pan about halfway. Place a clean, medium-sized bowl in the baking pan.
- In the other bowl or double-boiler insert, whisk the eggs until yolks and whites are well combined, adding the pinch of salt.
- Stabilize the bowl or insert by placing a rubber jar opener or folded wet kitchen towel underneath, then whisk in the juice.
Pour the juice in slowly with one hand, while whisking to combine it with the eggs using the other hand. For example, if you’re right-handed, pour the juice into the eggs with your left hand, and whisk with the right. - Whisk the sugar into the egg and juice mixture.
Use the same technique as you did to whisk in the juice. - Place the bowl or insert into the saucepan over the simmering water and, using the whisk, stir continuously for about 10 minutes, until the mixture starts to thicken.
For the first five minutes, nothing will happen, but keep stirring at a slow-to-medium pace. Around the 8-minute mark you’ll notice a little thickening, barely. Don’t stop stirring. You’ll want to keep the mixture moving the entire time so it cooks evenly and doesn’t have a chance to curdle. I’m not kidding. Don’t stop. Don’t step away for a minute, or you might end up with lemon scrambled eggs. - After 10-12 minutes test for doneness and temperature. You want to cook the mixture until its thickened and an instant-read thermometer reads 175° F.
If you don’t have an instant-read thermometer, try this old-school method of testing doneness: dip the back of a wooden spoon in the mixture. The curd should coat the back of the spoon. If not, keep stirring and cooking. If the spoon is coated, run your finger through the curd that sticks to the spoon. If the gap doesn’t close at all, the curd is ready to come off the heat.
- Turn off the heat, and remove the bowl or insert, placing it on a folded towel. Add half the butter cubes to the mixture and whisk until completely melted and combined. Then add the other half, again, whisking until completely combined.
As the curd cools, it will continue to thicken, so don’t worry if doesn’t seem thick enough now. However, residual heat will continue to cook the curd, so it’s important to bring the temperature down as soon as possible, which is why you want to get the curd into an ice-water bath.
- Add the remaining dozen ice cubes to the prepared ice-water bath.
- Optional: Sometimes you’ll end up with a few bits of cooked egg whites in the curd. If you want a completely smooth curd, you can strain it through a fine-mesh sieve into the bowl in the ice bath. Use a rubber spatula to press the curd through the sieve.
I had a few bits of egg white in my curd, but they’re so tiny that I could have skipped the straining. - If you skipped step 10, use a rubber spatula to scrape the curd from the double-boiler insert or bowl into the clean bowl in the ice bath.
- Cover the curd with a piece of plastic wrap so that the curd doesn’t develop a “skin.”
- Top up the water in the baking pan so that it’s equal with or slightly above the level of the curd in the bowl.
- Place the ice bath (with curd bowl) in the refrigerator and allow the curd to cool for 1-2 hours before serving.
- Store in a covered container in the refrigerator for about 3 weeks.