Ever feel like you’re in a race to keep ahead of food waste at home — particularly during the summer? Summer, for all of its wonderful bounty of fresh produce from CSA boxes, farmers’ markets, and home gardens, also presents a challenge: how to make the most of the fruits and vegetables that come into your home before they get too soft, wilty, or (ugh) moldy? With the drought continuing here in California, it seems more important than ever to use up what comes into the kitchen, rather than letting it any of it go to waste.
I seem to be managing the vegetables so far (salads — lots of salads with an array of lettuces — paired with roasted vegetables like fennel and carrots), but the fruit is another story. Between glossy, large, bright-red strawberries from Fifth Crow Farms and an abundance of quickly ripening backyard apricots and long-lingering lemons, I’ve got more than my fair share of fruit — and with it a small case of FOMO. I mean…What if I don’t make the most of that fresh, seasonal fruit while I can?

If you’re struggling with the idea of not enjoying all of that fruit while it’s fresh, ease up. The beauty of eating seasonally is that you get to look forward to that bounty and really appreciate it while the food is available — when it’s at the peak of flavor and freshness. But you also have the option to preserve that fruit for later enjoyment, too. So, here’s your cheat sheet for enjoying summer fruit now and later. From proper storage to freezing to (yes, you can!) making jams and preserves, here are some ways to reduce summer fruit waste at home.
Optimal Storage
I try to get as much life out of my fruit as possible, which starts with storing it appropriately. First thing to know: different summer fruits have different storage needs. More important is that not every piece of fruit has to (or should be) stored in the refrigerator. After many years of trial and error, here’s how I’m storing summer fruit.
- Berries: Don’t wash until you’re ready to use them. To store, line a plastic or glass storage container with paper towel. Arrange the berries in a single layer on the paper towel, cover with a well-fitting lid, and store on the top shelf of the refrigerator. Soft berries (raspberries, blackberries, etc.) will last a few days at most. I’ve been able to keep strawberries and blueberries this way for up to 10 days, but typically have to replace the paper towel and wipe down the interior of the storage container to remove condensation every 3-4 days.
- Stone Fruit: Again, I don’t wash stone fruit until I’m ready to use it. Store ripe fruit in a single layer in a dish or on a sheet pan at room temperature and use or freeze it within 2-3 days. Storing stone fruit in the refrigerator results in an unpleasant, mealy texture, so don’t do it. (Note: Cherries are the exception! Store cherries in a closed container or ziplock bag in the refrigerator to extend their lifespan.)
- Citrus: Wash, dry, and store at room temperature in a dish or bowl if you’re going to use them within 2 days. Otherwise, store in a ziplock bag (with the air pressed out) in coldest part of the refrigerator (usually the bottom shelf or crisper drawer). I’ve kept citrus this way for up to three months.
Freezing
Already know that you’ve got too much fruit on hand and want to freeze some for later? There are three ways to prepare fruit for freezing:
- Unsweetened Pack
- Syrup Pack
- Sugar Pack
I’ve tried all three methods and have found that the unsweetened approach is quickest, easiest, and leaves me the most flexibility for using the fruit when I thaw it. Here’s how:
- Wash the fruit, removing any dirt. Place on paper towels or cotton kitchen towels and pat dry, removing as much moisture as possible.
- Cut away any bruised, damaged, or moldy spots, then prepare the fruit as follows:
Strawberries: Remove green tops and hull.
Stone fruit: Slice in half and remove the pit.
Blueberries and soft berries: Remove any stems. - Arrange the fruit in a single layer on a parchment paper-lined sheet pan (don’t crowd or pieces might stick together when frozen), then place in the freezer for an hour or so — just until the fruit is frozen.

Frozen apricots: washed, halved, pitted. Ready for bagging. - Store fruit in a freezer bag with the air pressed out.

For more information about freezing fruit using the syrup and sugar pack methods, check out The National Center for Home Food Preservation’s web site.
Making Fruit Compotes
Compotes are my favorite way to use up berries that are past their prime for eating out of hand or not pretty enough for decorating a cake or tart. Berries, sugar, and lemon juice are all you need to make a quick berry compote, and you can tailor the amount of sugar and lemon juice to your taste.
Need a starting point? For every 6 ounces of berries, add 1 to 1½ ounces of sugar and a teaspoon of lemon juice. Cook in a saucepan over medium to medium-high heat for 10 minutes for a thinner, saucy compote, or as long as 15 minutes for a thicker, jammy compote. Try this Strawberry-Orange Compote (or substitute your favorite berries).

Preserving: Jams and Marmalades
I’ve been baby stepping my way into canning this year, but it’s turning out to be my new addiction! When I made my first batch of marmalade, and the canning seals didn’t bounce back when I tested them, I did the happy dance around my kitchen. After another successful batch of marmalade, I was ready to move on to making apricot butter, and then strawberry jam.
If you’ve been thinking about canning, but felt uncertain or afraid, don’t let that hold you back! It’s easier and less scary than you might think! Just take the time to learn a little about the process of canning and why it’s important to follow recipes and canning steps as written. Here are some resources that I’ve found informative and helpful.
- Easy citrus marmalade: If you’re just starting out, this Blood-Orange Rosemary Marmalade from The Herbfarm Cookbook is an easy introduction to canning. Prep work is minimal, and there’s no water bath processing step to worry about (you will have to sterilize the jars and lids, though). I’ve substituted regular oranges and ruby grapefruits with success.

Blood Orange-Rosemary Maramalade (just as good with ruby grapefruit or navel oranges!) - Small-batch canning: If you’re short on kitchen storage space or don’t want to invest in making large batches of jam (seriously, what would I do with 10 pints of jam??), then small-batch canning is for you! What do I mean by small-batch canning? Think: 2—4 pints or half-pints at a time. Food in Jars blogger and author Marisa McClellan offers a wealth of information about the equipment for and process of canning on her website, not to mention some tasty recipes. (Use the site’s search box to locate small-batch jam recipes or scroll through the recipe index.)

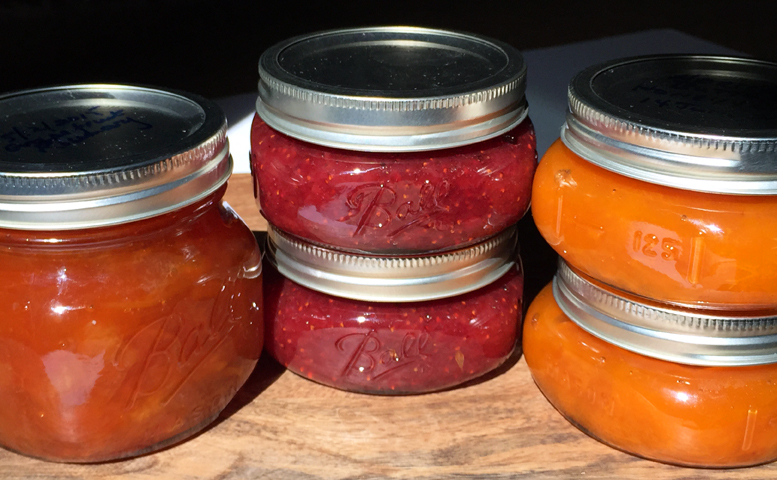
From left to right: Ruby Grapefruit and Rosemary Marmalade,
Honey Strawberry Jam, Apricot Butter - Pectin-free, low-sugar fruit jams: While searching for small-batch, pectin-free, low-sugar recipes, I stumbled upon this post on Northwest Edible Life. Blogger Erica not only provides a detailed introduction to making jam the old-school way, but also offers up this fun chart for creating your own custom flavors.


Sharing Is Caring
And let’s not forget the simplest way to reduce food waste: share with family, neighbors, and friends. Every summer I trade apricots to my next-door neighbors for their home-grown tomatoes. They make apricot pie, and I make a batch of oven-dried tomatoes (some of which eventually make it into the freezer for longer preservation!).
Want a broader community for sharing your abundance of home-grown fruits and vegetables? Try offering it on neighborhood websites Freecycle.org or Nextdoor.com.
How are you preventing summer food waste at home? Share your ideas and thoughts in the comments below or on our Facebook page.